How to Use a Bucket to Rinse Your Shower, After Scrubbing
SO. You’ve scrubbed your shower with shower cleaner and the abrasive side of a sponge. Now what, you ask? How do I remove soap, dirt, and debris from the shower after I’ve scrubbed it? You’re going to rinse the shower with water, just like you'd do after scrubbing a dish in the sink with soap and water. Think of the interior of your shower as one large dish that needs to be rinsed 😜
At The Tidy People we teach you how to clean a shower. Included in the linked guide, is a list of all of the products and tools needed to fully clean a shower from start-to-finish. One of the tools on this list is a bucket so that you can rinse the shower cleaner, soap scum, and debris down the drain as one of the final steps in the shower cleaning process.
GREAT NEWS (maybe) — if you have a detachable shower head in your shower, use this! This will eliminate the need to use a bucket to rinse the shower. For those that have no detachable shower head, the bucket is our next best option. Read ahead.
There’s also this Rinsaroo, which is a handheld hose that can be attached to your shower head or a faucet to create a similar effect as a detachable shower head. I tested this a few years ago in a few different homes. My team ended up not using this as professional housekeepers, as it became too cumbersome to figure out how to attach this to the variety of different shower heads that exist. I think this is a great option if it fits well on your shower head and it’s easy to take on and off.
A bucket however, provides some ease and it’s also a multi-functional tool. A bucket can be used to hold dirty towels as move throughout a cleaning, or be used for a mopping solution for floors.
Now, there’s an ART to rinsing the shower with a bucket.
Many times over, in the attempts of rinsing a shower, I’ve splashed myself and other parts of the bathroom.
So…you’ve scrubbed the shower from top to bottom and now it’s time to rinse it. What now? Here’s some tips and tricks on how to rinse the soap, scum, dirt, and debris down the shower with a bucket:
(1) Fill the Bucket 1/2 to 3/4 Full
When it comes to filling your bucket with water, it’s a Goldilocks and the 3 Bears type of situation…
Fill the bucket too little and you end up doing far more reps than you need to, to rinse the shower.
Fill the bucket too much and you’re far more likely to create a mess. It’s ok…if you end up filling the bucket too much, just pour a little out.
Find that middle ground of the “not too much” and “not too little” place with filling your bucket to create some ease in the rinsing process.
(2) Master the Art of the “Flip”
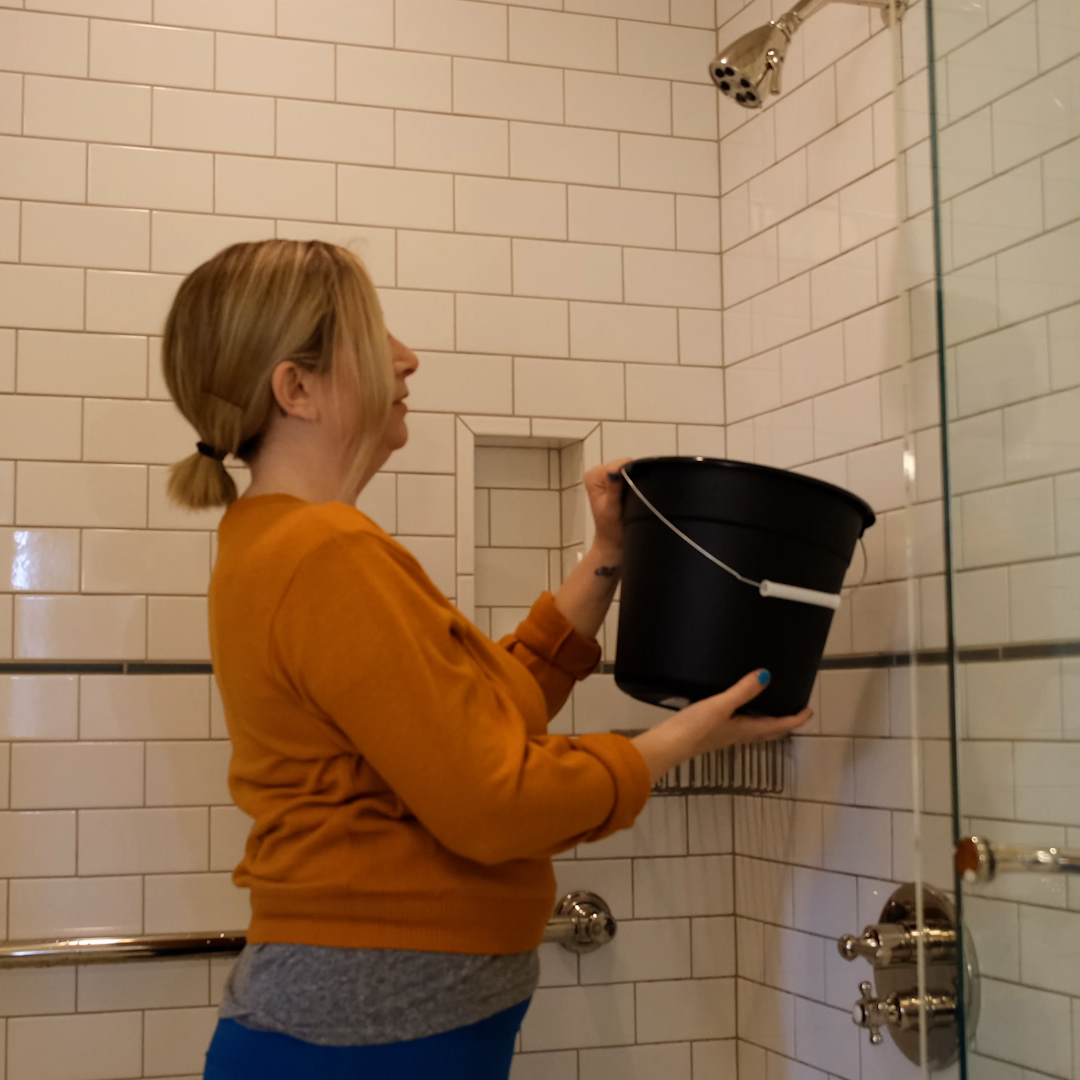
Now, when you start rinsing the shower with the bucket: instead of splashing the water all over the walls from far away, get an arms distance away from the wall. Hold the bucket with your elbows by your side (like you’re holding a basketball with both hands out in front of you). Then, flip the bucket sideways. At the same time press, the opening of the bucket (sideways) against the shower wall.
This should great a suction effect where the water stays in the bucket against the wall at the opening, while it’s flipped sideways (until you release some pressure).
(3) The Waterfall Effect
Until you’re ready to release the water, you can use ergo dynamics to take some of the heavy lifting off of your arms. Use your body weight to lean against the bucket until you’re in the correct position to start releasing water.
Position the bucket towards the top of the shower walls so that you can maximize the amount of rinsing that occurs over every area that was scrubbed below. Slowly start releasing water by lifting your body weight off of the bucket and use your muscles to hold the bucket up and off of the wall, ever so slightly.
Move the bucket back and forth, side to side. You’ll likely need to refill the bucket with water a few times during this process.
(4) Mind the Crevices
Depending on how your shower is built, there might be shelving cut outs or ledges installed into the walls. Sometimes the waterfall effect will not rinse these areas OR cause water to splash back and all over you.
In this instance, try standing back slightly to splash a little bit of water (a little, not a lot) over these surfaces.
(5) Glass Shower Doors
If your shower has a glass shower door, try scrubbing the interior of the glass shower door with the rest of the shower. For the exterior, use a glass cleaner and a squeegee.
When rinsing the interior of the glass shower door: if you can, try swinging the glass door so that it swings toward the inside of the shower, partway. Rinse it as you would with the waterfall effect. You may need to do some finagling with the door by keeping the door in place with your foot while you apply pressure to the other side of the door with the bucket.


